General settings
Content
In the settings of Bucher Coaching Systems many parameters for all sorts of purposes can be established.
Click on
 Additional and help options and then on
  Settings.
The following window will appear:
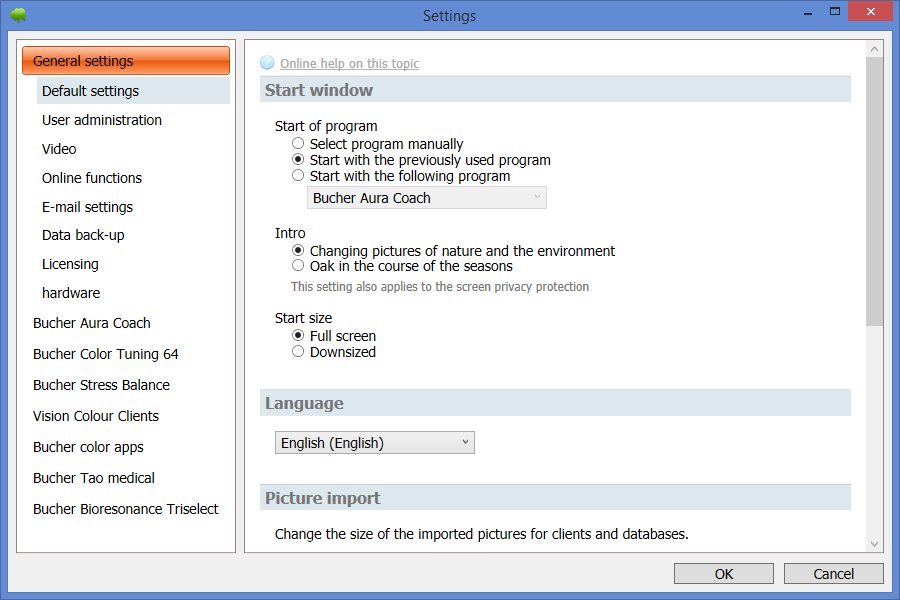
You may not see so many entries on the left column in your version, if you don´t have a license for your product.
Default settings
The following settings can be specified:
Startup window
- Program start
Here you can specify how Bucher coaching Systems should start. You can manually choose the program in the Start window, or the most recently used will automatically run, or you can select which program should automatically start. In the last two options, the startup window is displayed for 5 seconds and then the program starts automatically. - Intro
Here you can select an image to be displayed at the startup window. It will be either a picture of Bucher GmbH that changes every 2 weeks, which is downloaded from the Internet, or an image of the Bucher tree that changes each season. (If your computer is not connected to the Internet, the season tree is displayed automatically. This setting also applies to the screen saver.) - Startup size
You can specify whether you want Bucher coaching Systems to start in full screen or in a reduced screen (50 pixels to the screen limit/taskbar)
Language
Select the language in the selection and click on the OK button to confirm.
Until now Bucher coaching Systems is available in German, English and Spanish.
Image import
Here you can set the maximum size, in which Bucher coaching Systems stores your client and database images. You can choose between 320, 480, 640, 800, 1024, 1280, 1600 or 2048 pixels. The default is 800 pixels.
Print format
- Footer for reports
Enter here the text that will be displayed at the bottom of each page in the reports of the measurements. - Output format
As output format for the reports, you can select the PDF format from Adobe or XPS format from Microsoft wählen. More common is currently the PDF format.
Other
- Data Transfer
With this button you can import clients and scan data (including client images) from older Bucher programs into Bucher Coaching System. Currently this is only possible for the Bucher Aura Coach Version 2. - Network Setup
This function copies the databases of Bucher Coaching Systems and the additionally required directories from the original program directory (C:\Bucher GmbH\Bucher Coaching Systems\) to another directory specified by you. This can be either on your hard disk or on another computer on your network. - Set file path to network path
With this the additional program Bucher Repair Tool is started, which allows you to change the data path to the database in which your clients and scans are stored. For example, on a path of another computer on your network. - Send databases to Bucher GmbH
For a better understanding of the problems with our software, we might require a copy of your database. Your privacy remains naturally preserved. The data will be treated confidentially in any case. If you agree that your data are used for testing purposes (they are transmitted encrypted to Bucher GmbH), then use this function.
User management
You need this function only under direction of Bucher GmbH.
Video
If your webcam (e.g. when you enter clients photos) doesn´t respond with the variant 1, then you can try option 2.
Online functions
The following settings can be specified:
Internet access
Enable the access to the Internet to be informed about updates of Bucher Coaching Systems or news and products of Bucher GmbH (Recommended).
Accessing the internet
Here you can login with the data that you received from the Bucher GmbH by e-mail.
If you click on
 Bucher User Center under
  Additional and Help functions, you will be redirected to the Bucher User Center and automatically logged.
E-Mail settings
Most products in Bucher Coaching Systems can send e-mails. For this purpose an existing mail account is required. You can enter the users´ data in the Bucher User Center in Internet or in the program itself. If you enter the data in the program, proceed as follows:
The following settings can be specified:
- E-Mail sender - This name appears in your client as the sender, if he has received an email from you, for example, John Doe.
- E-Mail address - Your email address, e.g. john@doe.com or john.doe@yahoo.com.
- User name - This can be the email address, a part of the email address or a combination of text and numbers (depending on your e-mail provider).
- Password - Any combination of numbers and/or text.
- SMTP-Server/Port - The SMTP server is responsible for the sending of mails. The address depends on the email provider (e.g. smtp.mustermann.de or mail.gmx.net, see the list of common SMTP-servers). The port is 25 by default, but it may vary by e-mail providers.
- This server requires an encrypted connection (SSL) - It depends on your e-mail provider, but it´s not required for most of them.
- Cc - Enter here another email address (e.g. your own) to which the mail is to be sent.
- Bcc - If you do not want that the client sees the second e-mail address, you can enter it here. The second receiver is then invisible.
E-mail Template
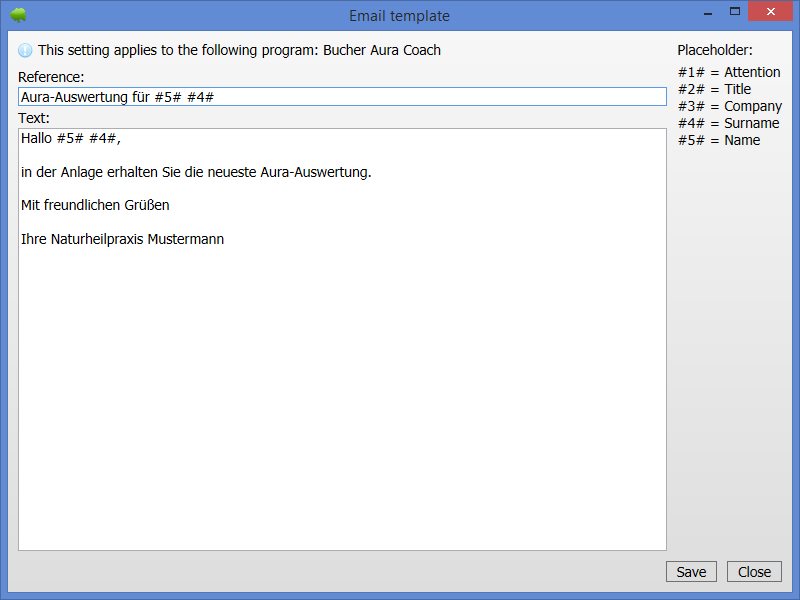
So that you don´t always have to write the subject and text when sending emails to your clients, you can create a template here. You can use wildcards, which are then automatically filled with the data of the current client. Wildcards are available for the following data: Title, Company name, Last name, Name
Example of a template for the Bucher Aura Coach:
Backup
The backup is a very important function of our system. A loss or corruption of data is indeed relatively rare, but when it occurs, it is usually painful or even expensive if there is no regular data backup.
The following settings can be specified:
Auto-Backup
In the backup path you can specify where the data is going to be stored. If you are unsure, then please leave the setting to C:\Bucher GmbH\Bucher Coaching Systems\Backup.
The backup would be even safer if the data could be stored on an external device (USB flash drive or external hard drive) instead of on the C hard drive. However, you must know the right path.
For a backup interval of 1 day, you should write 1. Thereby Bucher Coaching System makes a backup ONCE a day, namely after the first exit of the program.
With the option Delete oldest backup, in combination with the number in the box How many backups to be kept, you specify that when the maximum number of existing backups is exceeded, the oldest backup should be deleted. This avoids that the backup storage will be full.In the window Backup, you can see two information files, namely Estimated required space for one backup and Free space (Disk drive), which shows you the free space remaining on your backup media.
In the lower part, there are two buttons:
Delete all backups
This deletes the existing backups on the backup media
Perform a backup now
You can perform an immediate backup by clicking this button, without having to exit the program.
Complete backup
Here you can export all data including your clients´ images in a file. But this can take some time, depending on the amount of data, however, this is not performed at regular intervals but only manually.
If you, for example, would like to make change your computer, you can save the data on your old computer with the button Full backup and copy them on your new computer with the button Perform Complete Restore Now.
Licensing
In order to use the programs from Bucher Coaching Systems, a license must be carried out. There are two different types of licensing. The diodes licensing and the online licensing.
Activation with a diodes licensing
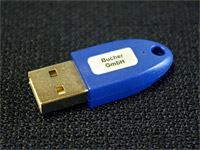
For the diode licensing, you will receive a diode by Bucher GmbH in the form a little blue USB stick (see the next picture), that you should plug into an available USB port on your computer.
Updating the diode
If you unlock more modules at Bucher GmbH or have problems with your diode, you must update the diode from the program. To do this, follow these steps:
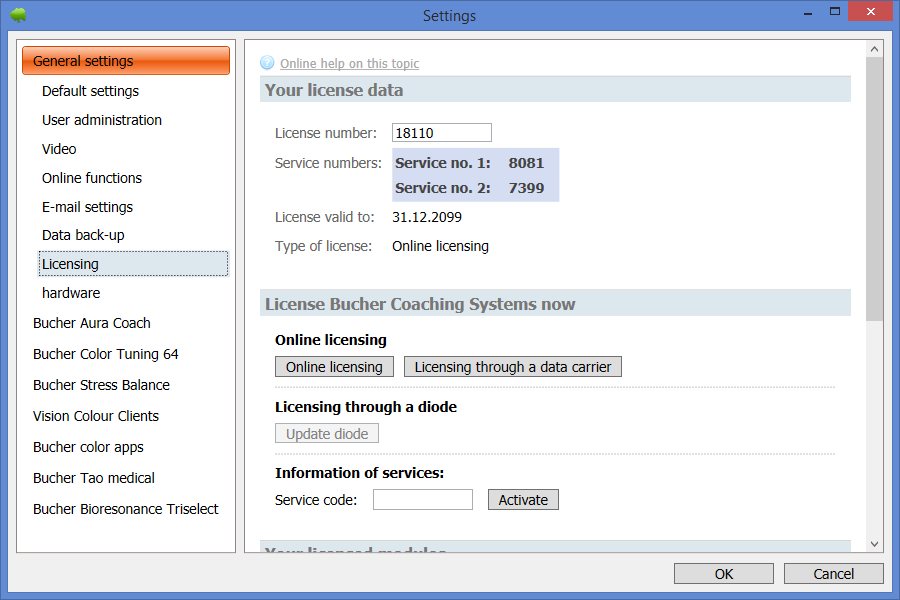
Click under License Bucher Coaching Systems now on the button Update diode (see the next picture).
Activation with an Online license
So that the Online Licensing works, the Bucher GmbH needs the required service number 1 (see following figure), and you must provide it (by phone or by e-mail).
After the first launch a window will appear with an invitation to enter the license number you received from Bucher GmbH.
If you have not entered the number yet, enter your license number in the area for the license data (in this example the number 18110).
Click then under License Bucher Coaching Systems now on the button Online Licensing (see the next picture).

An overview of your activated modules (programs) can be seen under your unlocked modules..
Hardware
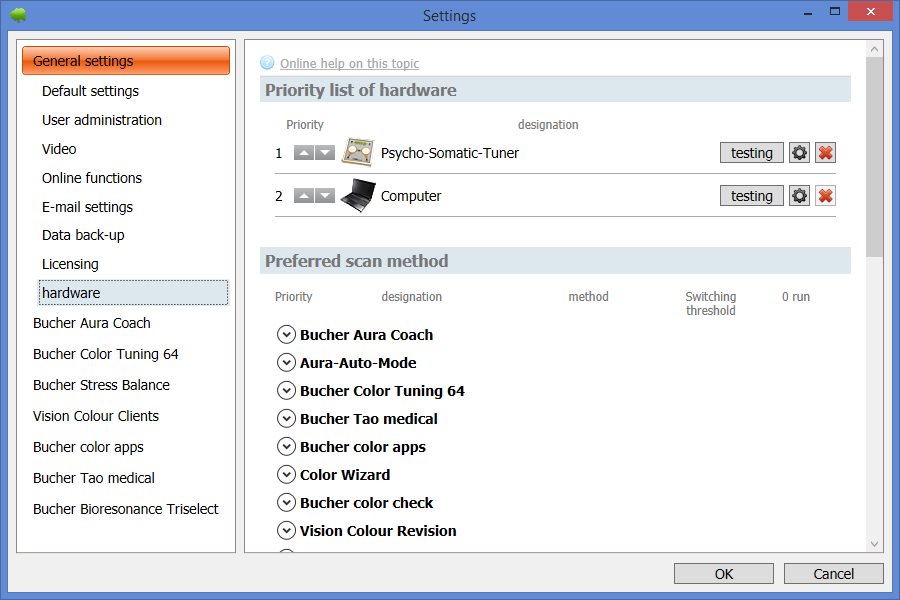
Since Version 6.4.0, a management hardware was integrated in Bucher Coaching Systems, which allows you to manage all devices (tuners, lights...).
When starting the program, it will check which hardware is connected and which related functions are available. This is especially useful to "warm up" the device, so that all functions really work when you are scanning and transmitting. The manager can be executed as follows:
Priority list of hardware
Here you can select which device has which priority level. When e.g. the bio-signal Tuner is on the 1st position of the priority list and the tripod lamp on the 2nd, then the system doesn´t start the tripod lamp until the bio-signal tuner is unplugged. With the two small buttons "arrow up" / "arrow down", the order (priority) of the devices can be moved. Those devices that are not currently connected are displayed as semi-transparent.
Each entry has a "Test" button. So you can switch on all LEDs and if available also the light color of the corresponding device, to check if everything works. In addition, there is a button with a gear for each device. With this you can see which options are available for each device.
On the far right there is a button with a red X. So you can delete the device, if it is no longer needed. As soon as you plugging it again via USB, the device is re-detected and can be used.
Preferred scanning methods
Here you can select the scanning method for each licensed software and for each hardware of the priority list, e.g. the hand-held applicators or the input cup for the bio-signal tuner or the diode for the Psycho-Somatic tuner.
You only have to open the desired software product with the little arrow and then determine the options you need to scan.
Preferred sending method
Here you can select the transmission method for each licensed software and for each hardware of the priority list, e.g. the input cup or the card encoder for the bio-signal tuner or the color light for the tripod lamp. You only have to open the desired software product with the little arrow and then determine the options you need to transmit.
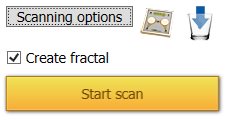
When scanning or sending, the equipment and methods used are displayed next to the button "Scanning Options" or "Sending Options"
Scanning options for Bucher TAO Medical (Example: Psycho-Somatic Tuner / Input cup)
Sending options for Bucher TAO Medical (Example: Psycho-Somatic Tuner / Hand-held applicators)
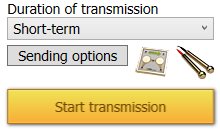
Therefore you are always properly informed, with which device will be sent or scanned. You can always change the specifications predefined in the setting in the scan or sending window by clicking on the different option buttons. In this case, that specified method will be used for that scanning or sending process. In the next process, the preselected configuration and devices will be used.
Additional settings for the different products
With the other settings for the different products, you can specify the options with which scans and programs are to be carried out.

 Sales agencies Germany
 Sales agencies Switzerland
 Sales agencies Austria
 Sales agencies Spain
 Sales agencies Mexico
 Sales agencies Netherlands
 Sales agencies North America
 Sales agencies Australia
 Bucher sales agencies map
 english
 Deutsch
 日本語
日本語 Español
 Schweizer Seite